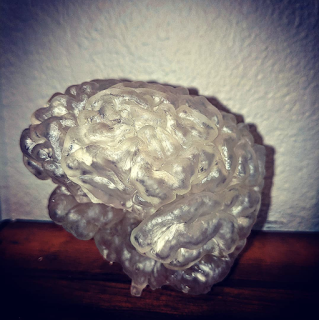
Is it a weird flex to print your brain in gold? Academic flexes are the future and I’m starting them. Before I print my brain in gold, I’ve already printed it in plastic!
You might be wondering how to do this and it’s fairly easy to do. If you get stuck or have questions along the way, leave a comment or send me an email.
You will need:
- A T1w scan of your brain from a MRI, often referred to as the structural scan or MPRAGE.
- FreeSurfer (free download)
- Meshlab (free download)
- FSL (free download)
I won’t walk through how to install each of these software on your computer. There are plenty of tutorials online. I followed this tutorial to create it and I’m going to add in some helpful context for anyone else who wants to attempt it. This tutorial is only intended for UNIX based operating systems e.g. MAC or Linux. If you aren’t an experienced programmer, keep in mind of your current working directory as you go through these steps. If you aren’t in the correct directory, the commands will not work.
Setting Up Your Files
First open up terminal and change your directory to where your T1w dicoms are stored. You’ll first want to convert your T1w dicom files using the dcm2nii command or using the GUI to nifti format. Next you’ll want to change the name of your nifti file. to sub-001.nii.gz. To do this use the mv command. Once this is done you’ll want to move your nifti file into a directory called sub-001. You can create a directory by using the mkdir command and move the nifiti file using the mv command.
Your file structure should look like:

Setting Up the FreeSurfer Environment and Cortical Reconstruction
Type the following into terminal:
export SUBJECTS_DIR=myDirectory #this is the directory where you created the sub-001 directory
mkdir -p $SUBJECTS_DIR/sub-001/mri/orig
mri_convert sub-001/sub-001.nii.gz $SUBJECTS_DIR/sub-001/mri/orig/001.mgz
recon-all -subjid sub-001 -all -time -log logfile -nuintensitycor-3T -sd $SUBJECTS_DIR -parallel
Once you have run the last command successfully, it’ll take about 10 hours. If you start this when you get home on Friday night at 6pm, by the time you’re done with that rave, it’ll be ready for the next steps.
Creating the 3D Model: Cortex
To create the cortical 3D model, run this code in terminal:
mris_convert --combinesurfs $SUBJECTS_DIR/sub-001/surf/lh.pial $SUBJECTS_DIR/sub-001/surf/rh.pial $SUBJECTS_DIR/cortical.stl
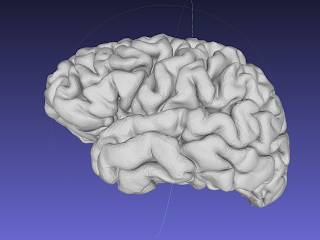
And then let’s look at the file and make sure it worked:
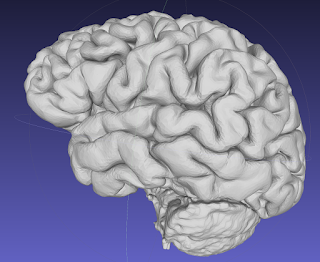
meshlab $SUBJECTS_DIR/cortical.stl
The file should look pretty similar to my brain:
Smoothing the Cortex
To smooth the model and make it look nicer: 1. Filters 2. Smoothing, Fairing, and Deformation 3. ScaleDependent Laplacian Smooth
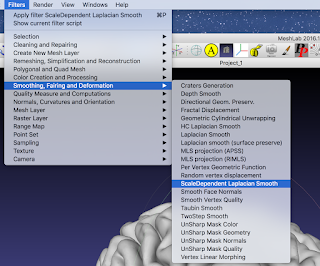
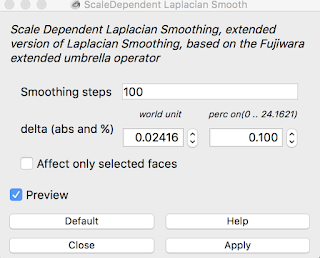
Change the smoothing steps to 100, change the delta % to 0.100, and check “Preview”.
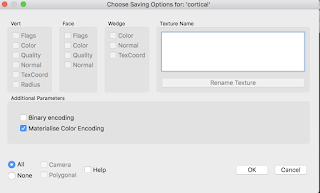
Export the file by clicking: 1. File 2. Export Mesh
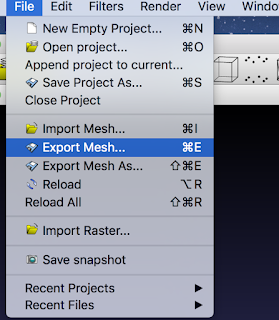
Uncheck “Binary encoding” and click OK.
Creating the 3D Model: Subcortical
This one takes a little more work to do because FreeSurfer doesn’t explicitly model the subcortical structures like the cortical ones. You can skip this part if you don’t care about printing your cerebellum and brain stem.
mri_convert $SUBJECTS_DIR/sub-001/mri/aseg.mgz $SUBJECTS_DIR/subcortical.nii
mri_binarize --i $SUBJECTS_DIR/subcortical.nii \
--match 2 3 24 31 41 42 63 72 77 51 52 13 12 43 50 4 11 26 58 49 10 17 18 53 54 44 5 80 14 15 30 62 \
--inv \
--o $SUBJECTS_DIR/bin.nii
fslmaths $SUBJECTS_DIR/subcortical.nii \
-mul $SUBJECTS_DIR/bin.nii \
$SUBJECTS_DIR/subcortical.nii.gz
cp $SUBJECTS_DIR/subcortical.nii.gz $SUBJECTS_DIR/subcortical_tmp.nii.gz
gunzip -f $SUBJECTS_DIR/subcortical_tmp.nii.gz
for i in 7 8 16 28 46 47 60 251 252 253 254 255
do
mri_pretess $SUBJECTS_DIR/subcortical_tmp.nii \
$i \
$SUBJECTS_DIR/sub-001/mri/norm.mgz \
$SUBJECTS_DIR/subcortical_tmp.nii
done
fslmaths $SUBJECTS_DIR/subcortical_tmp.nii -bin $SUBJECTS_DIR/subcortical_bin.nii
mri_tessellate $SUBJECTS_DIR/subcortical_bin.nii.gz 1 $SUBJECTS_DIR/subcortical
mris_convert $SUBJECTS_DIR/subcortical $SUBJECTS_DIR/subcortical.stl
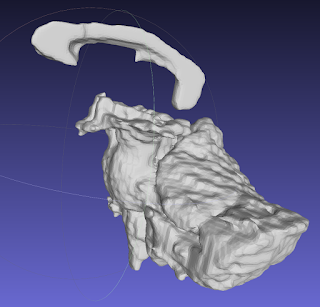
meshlab $SUBJECTS_DIR/subcortical.stl
Which will give you a rendering like this after smoothing:
Export the file the same way as you did the cortical structure.
Combining the Cortical and Subcortical Models
Combine your files by running these commands:
echo 'solid '$SUBJECTS_DIR'/final.stl' > $SUBJECTS_DIR/final.stl
sed '/solid vcg/d' $SUBJECTS_DIR/cortical.stl >> $SUBJECTS_DIR/final.stl
sed '/solid vcg/d' $SUBJECTS_DIR/subcortical.stl >> $SUBJECTS_DIR/final.stl
echo 'endsolid '$SUBJECTS_DIR'/final.stl' >> $SUBJECTS_DIR/final.stl
And you’ll get something like this:
Printing
That’s it, you can now print your brain! If you don’t own a 3D printer or have a roommate who works at Google, you can send it to a website like https://www.shapeways.com/ or you can peruse this list: https://all3dp.com/1/best-online-3d-printing-service-3d-print-services/. Happy printing :)